
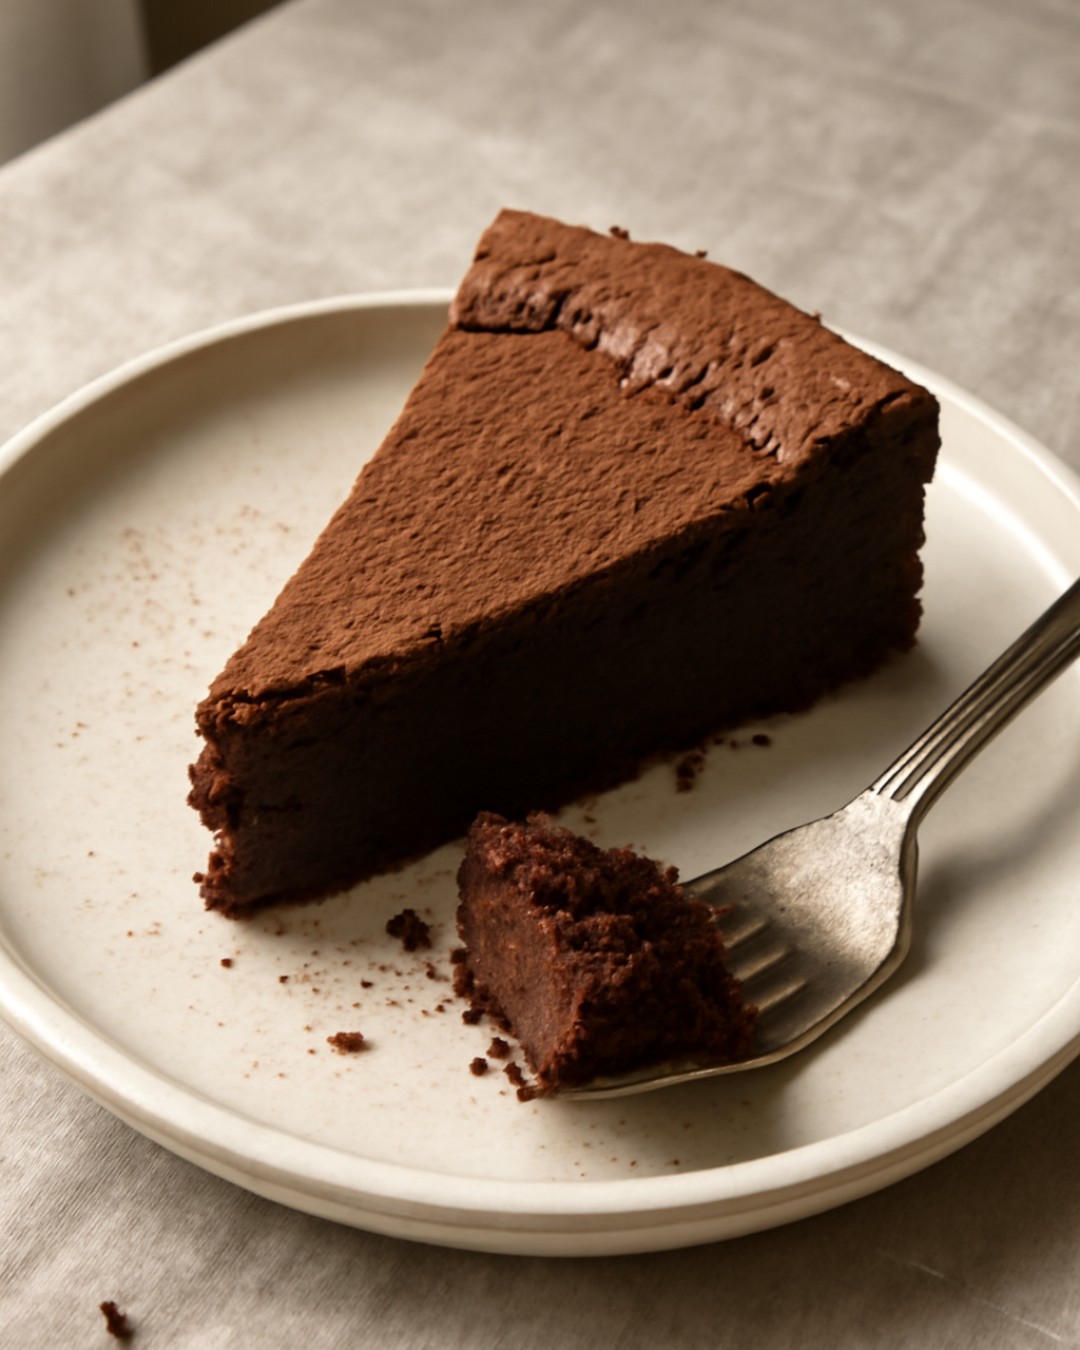
A rich, flourless chocolate cake sounds like it should be complicated—something you’d order from a bakery, not pull together on a weeknight. But this cake is actually simpler than most traditional cakes. No flour means no measuring flour, no sifting, no worrying about gluten development. The result is a naturally fudgy, intensely chocolate dessert that feels elegant enough for company but doesn’t demand any special technique or hard-to-find ingredients.
Eggs and chocolate do the heavy lifting. The eggs provide structure and lift while the melted chocolate creates that dense, moist crumb. It’s the kind of dessert that looks like you know what you’re doing in the kitchen, even if you’ve never made one before.
What Makes This Cake Different — A rich flourless chocolate cake
Most flourless chocolate cakes rely on whipped egg whites to create height and airiness. This version uses whole eggs beaten together, which gives you a denser, more fudgy texture—closer to a brownie than a traditional cake. The result is moist and rich without being heavy or overly dense.
This cake doesn’t need any baking powder, baking soda, or leavening agent. The eggs provide all the lift needed. That simplicity means fewer ingredients, less room for error, and a naturally gluten-free result without any special substitutions.
Ingredients You’ll Need
The ingredient list is short because every item matters. Use good-quality chocolate—not necessarily expensive, but chocolate you’d actually want to eat on its own. Cocoa powder adds extra chocolate depth without adding moisture. Room-temperature eggs blend smoothly into the batter and help create a stable emulsion with the melted chocolate and butter. Salt is crucial; it intensifies the chocolate flavor and balances the sweetness.
If you don’t have unsweetened cocoa powder, skip it rather than using sweetened cocoa mix, which will throw off the sugar balance and make the cake too sweet.
How to Make It
Start by preheating your oven and preparing an 8-inch round cake pan. Line the bottom with parchment paper and lightly butter the sides—this prevents sticking without adding extra fat that would affect the cake’s texture.
Melt the chocolate and butter together. A heatproof bowl set over a pot of simmering water works well. Stir occasionally until smooth, then remove from heat and let it cool for a few minutes before adding eggs.
In a separate bowl, whisk together the eggs, sugar, salt, and vanilla for about 2 minutes until the mixture is pale and slightly thickened. The color should noticeably lighten.
Pour the cooled chocolate mixture into the egg mixture and fold gently until combined. Sift the cocoa powder over the top and fold it in carefully. The batter should be smooth with no streaks of cocoa remaining. Don’t overmix at this point; you want to preserve the air you’ve just incorporated.
Pour the batter into your prepared pan and smooth the top. Bake for 25 to 30 minutes. The cake is done when the edges are set and firm but the center still has a slight jiggle when you gently shake the pan. The center will look slightly underbaked—that’s correct. It will firm up as the cake cools.
Let the cake cool in the pan for 15 minutes. Then turn it out onto a wire rack and let it cool completely before serving or frosting. If you slice it while it’s still warm, it will be too soft and may crumble.
Preventing Cracks & Achieving the Perfect Texture
Cracks on top are normal for this cake. If you want a smoother top, you can cover it with ganache, whipped cream, or a thin layer of frosting once it’s cooled.
The most common mistake is overbaking. The center should still look slightly underdone when you remove it from the oven. It will continue to firm as it cools, and you want to preserve that fudgy texture. If you bake it until the center looks completely set, the cake will be dry and cakey rather than rich and moist.
Topping & Frosting Ideas
This cake is delicious on its own, but a simple topping makes it feel more special. A chocolate ganache is the natural choice—just heat cream and pour it over chopped chocolate, let it sit for a minute, then stir until glossy. Fresh raspberries or strawberries add brightness and color. Whipped cream is always welcome. A dusting of cocoa powder or powdered sugar works too.
For a dairy-free version, use coconut cream instead of heavy cream for the ganache or serve the cake with coconut whipped cream and berries.
Storage & Make-Ahead Options
The cake keeps well covered at room temperature for up to 2 days. You can also refrigerate it for up to 4 days—it actually becomes easier to slice when cold. If you want to make it ahead, bake the cake the day before, cool it completely, wrap it well, and refrigerate. Add any topping or frosting just before serving so it looks fresh.
This cake does not freeze well once baked, since the texture becomes grainy when thawed. However, you can freeze the batter in a prepared pan for up to a month—just add 2 to 3 minutes to the baking time if baking from frozen.
Variations: Dairy-Free, Paleo & Beyond
For dairy-free: use dairy-free butter and chocolate. The cake will bake the same way and taste essentially identical.
For a paleo version: substitute coconut sugar for regular sugar (use the same amount) and dairy-free chocolate. The cake will be slightly less sweet and may have a subtle coconut undertone, but the texture will be the same.
Rich Flourless Chocolate Cake
A naturally gluten-free chocolate cake with a dense, fudgy crumb. Made with melted chocolate, eggs, and cocoa powder—no flour required. The center stays tender and moist, and the cake tastes even better the next day.
Ingredients
- 6 ounces semi-sweet or dark chocolate, chopped
- 6 tablespoons unsalted butter
- 4 large eggs, room temperature
- ¾ cup granulated sugar
- ¼ teaspoon salt
- 1 teaspoon vanilla extract
- ¼ cup unsweetened cocoa powder
Instructions
- Preheat oven to 350°F (175°C). Line the bottom of an 8-inch round cake pan with parchment paper, then lightly butter the sides.
- Combine the chopped chocolate and butter in a heatproof bowl set over a pot of simmering water. Stir occasionally until completely melted and smooth. Remove from heat and let cool for 2 to 3 minutes.
- In a separate bowl, whisk together the eggs, sugar, salt, and vanilla. Whisk for about 2 minutes until the mixture is pale and slightly thickened.
- Pour the cooled chocolate mixture into the egg mixture and fold gently until combined.
- Sift the cocoa powder over the batter and fold in carefully until no streaks of cocoa remain. Do not overmix.
- Pour the batter into the prepared pan and smooth the top.
- Bake for 25 to 30 minutes. The edges should be set and firm, but the center should still have a slight jiggle when you gently shake the pan.
- Let the cake cool in the pan for 15 minutes, then turn it out onto a wire rack and cool completely before serving or frosting.
Notes
Room-temperature eggs are important—they blend smoothly and help create a stable batter. The cake looks underbaked when it comes out of the oven, which is correct. The center will firm as it cools. Cracks on top are normal and part of the cake’s character.
Storage
Store covered at room temperature for up to 2 days, or refrigerate for up to 4 days. The cake becomes easier to slice when cold. Do not freeze after baking.
Frequently Asked Questions
Can I use milk chocolate or white chocolate instead?
Milk chocolate will work but will be sweeter and less intensely chocolatey. White chocolate won’t work—it lacks cocoa solids and won’t provide the structure the cake needs. Stick with semi-sweet or dark chocolate for the best result.
What if I don’t have a double boiler?
A heatproof bowl set over a pot of simmering water works perfectly. Just make sure the bottom of the bowl doesn’t touch the water. You can also melt the chocolate and butter in 30-second bursts in the microwave, stirring between each burst, until smooth.