
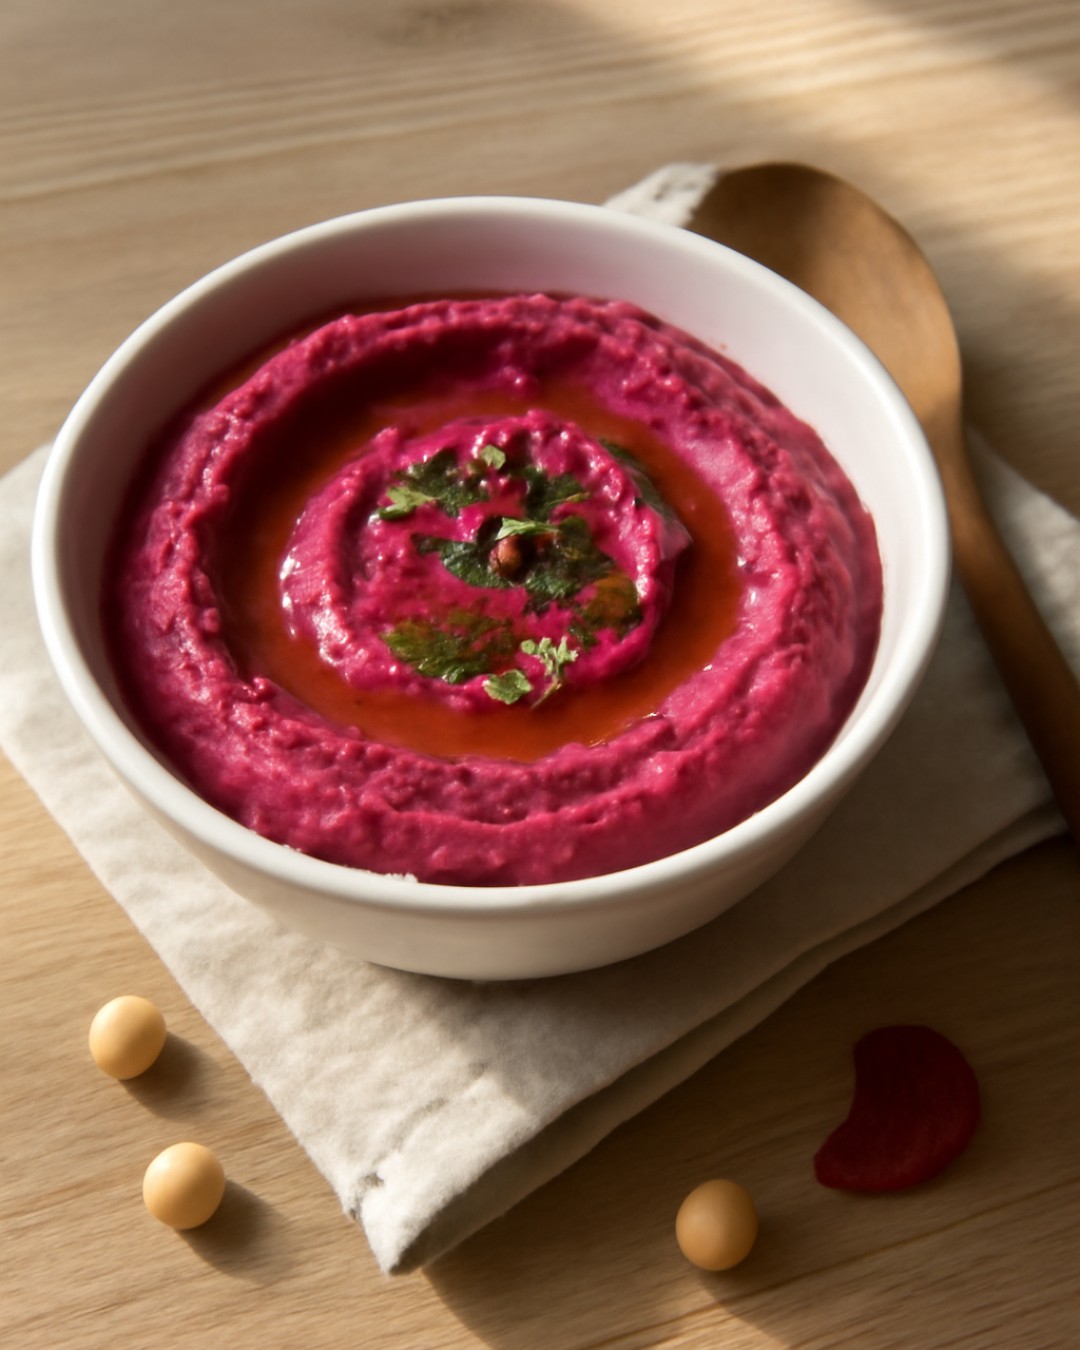
I first made a beetroot hummus recipe on a Tuesday night when I had half a can of beets left over from a salad and absolutely no plan for dinner appetizers the next day. My 12-year-old had invited friends over, and I wanted something that looked intentional, not thrown together. Twenty minutes later, I had a dip so vibrant and magenta that it looked like I’d spent hours in the kitchen. I hadn’t. That’s exactly why I keep making it.
Why Make Beetroot Hummus at Home
Here’s the thing about a beetroot hummus recipe compared to traditional chickpea hummus: it’s not just about the color, although I’ll admit that deep magenta hue is what gets people’s attention first. The real advantage is that beets add natural sweetness and earthiness without any of the heaviness you sometimes get from tahini-heavy versions. It’s lighter, it comes together faster, and honestly, it tastes fresher.
This is one of those recipes that works equally well for a casual weeknight snack as it does for entertaining. You can make it ahead; it keeps beautifully in the fridge, and it pairs with almost anything—raw vegetables, pita chips, crackers, or even spread on a sandwich. I’ve also found that my 8-year-old, who normally picks around anything that looks remotely unfamiliar, will eat this one without complaint. The color helps. Kids are visual creatures, you know?
The other practical benefit is cost. A can of beets and a can of chickpeas cost less than most specialty dips at the grocery store, and you’re controlling exactly what goes into it. No mystery ingredients, no added sugar hiding in the ingredient list.
Ingredients for Homemade Beetroot Hummus
- 1 can (15 oz) chickpeas, drained and rinsed—canned works perfectly here; no need to cook dried beans for this recipe
- 1 can (15 oz) beets, drained well—I use the plain kind with no added vinegar, as the acidity can throw off the flavor balance
- 3 tablespoons tahini—this is the sesame paste that gives hummus its signature creamy texture; if you don’t have it, I’ll show you substitutes below
- 2 cloves garlic, minced—fresh is better than jarred here because the flavor is cleaner
- 2 tablespoons lemon juice — fresh lemon is worth it; bottled tastes flat in comparison
- 1 tablespoon olive oil—use something you’d actually eat; this isn’t the place for the cheapest bottle
- ½ teaspoon ground cumin — optional, but it adds warmth without changing the color
- Salt and pepper to taste — start with ¼ teaspoon salt and adjust from there
- 2–3 tablespoons water — to reach the consistency you want
One note on the beets: drain them really well and even pat them dry with a paper towel. Extra liquid is the main reason homemade beetroot hummus recipe versions turn out watery instead of creamy.
Step-by-Step Beetroot Hummus Recipe
- Add the drained chickpeas, drained beets, tahini, minced garlic, lemon juice, and olive oil to a food processor. If you don’t have a food processor, a blender works, though you may need to add the water a bit earlier to help things move around.
- Pulse everything together for about 30 seconds. You want it roughly combined but not yet smooth.
- Add the cumin and ¼ teaspoon salt. Pulse again for another 30 seconds.
- Scrape down the sides of the processor bowl with a rubber spatula. This matters because beet pulp likes to stick to the sides, and you want everything incorporated evenly.
- Blend on medium speed for 1–2 minutes. The mixture should go from chunky to creamy. If it’s still too thick or grainy, add 1 tablespoon of water at a time while blending, up to 3 tablespoons total. Stop before it becomes soup—you’re looking for the texture of thick peanut butter.
- Taste and adjust. Add more salt if it needs it, more lemon juice if you want brightness, or a pinch more cumin if the earthiness isn’t coming through. I usually add a few extra grinds of black pepper here.
- Transfer to a serving bowl or storage container. If you’re serving right away, drizzle a little extra olive oil on top and maybe a sprinkle of paprika or fresh herbs for color.
The whole process takes about 10 minutes, and most of that is just letting the food processor do the work. Trust me on this: don’t skip the scraping step. Beets are stubborn, and you want an even texture throughout.
Canned vs. Fresh Beets: Which Works Best
I’ll be real with you: fresh beets are delicious, but they’re not necessary for this beetroot hummus recipe. You’d have to roast them, let them cool, peel them—it adds 45 minutes to your timeline and honestly doesn’t improve the final flavor enough to justify the extra work on a weeknight.
Canned beets are already cooked and have a softer texture that blends into hummus more smoothly. The only thing to watch for is the liquid they’re packed in. Some brands use vinegar, which can make the hummus taste sour. I always check the label and pick the plain kind. If all you can find is vinegar-packed, drain them extra well and rinse them under cold water for a minute.
One small tip: if your canned beets seem very wet, drain them in a fine-mesh strainer for a few minutes before using. This prevents your finished beetroot hummus recipe from being thin or grainy.
Tahini Substitutes for Beetroot Hummus
Not everyone has tahini on hand, and it’s not always cheap. If you don’t have it, here are practical swaps that work:
- Almond butter or peanut butter: Use the same amount (3 tablespoons). The flavor will be slightly nuttier, but it won’t taste out of place. Peanut butter is usually cheaper.
- Sunflower seed butter: Another 1:1 swap. This is milder than tahini and works beautifully with beets.
- Greek yogurt: Use 2 tablespoons tahini plus 2 tablespoons plain Greek yogurt. This lightens the texture and adds tanginess. It’s not quite the same, but it’s good.
- Olive oil alone: If you’re out of everything, use 4 tablespoons olive oil instead of the 3 tablespoons tahini plus 1 tablespoon olive oil. The hummus won’t be quite as creamy, but it’ll still work. Add the water gradually to get the right texture.
My preference when I’m substituting is sunflower seed butter because it doesn’t compete with the beet flavor. But I’ve made this beetroot hummus recipe with almond butter in a pinch, and nobody complained.
Serving Suggestions & Pairing Ideas
The vibrant color of this dip means it looks good on a board with almost anything. I usually serve it with:
- Raw vegetables: carrots, celery, bell peppers, cucumber, radishes
- Pita chips or toasted pita bread
- Whole-grain crackers
- Roasted chickpeas for extra crunch
- A drizzle of extra olive oil and a sprinkle of fresh dill or mint on top
I’ve also spread this beetroot hummus recipe on sandwiches, swirled it into grain bowls, and used it as a base layer for a vegetable platter. It’s flexible enough that once you make it once, you’ll find your own uses for it.
Storage & Make-Ahead Tips
This is where the beetroot hummus recipe really shines for meal prep. Store it in an airtight container in the refrigerator for up to 5 days. The flavor actually deepens slightly after a day, so making it the day before entertaining is smart.
If you want to freeze it, you can, though the texture becomes slightly grainier when thawed. I wouldn’t recommend freezing for longer than a month. Thaw it in the refrigerator overnight and give it a good stir before serving. You may need to add a tablespoon of water to restore the original consistency.
One practical note: if your beetroot hummus recipe separates slightly in the fridge (a little liquid pools on top), that’s normal. Just stir it back in. It’s not a sign anything went wrong.
Nutritional Benefits of Beetroot Hummus
Beets are packed with folate, manganese, and betalains—compounds that give them their color and have anti-inflammatory properties. Chickpeas add fiber and plant-based protein. Combined, they make a dip that actually fills you up, not just sits on a plate looking pretty.
A typical serving of this beetroot hummus recipe (about ¼ cup) has around 80–100 calories, depending on how much oil you use. It’s naturally vegan if you’re keeping track of that, and it fits into most dietary approaches without fuss.
That said, I’m not a nutritionist, and I’m not making health claims here. What I will say is that this is a genuinely better-for-you dip than a lot of store-bought versions, and it tastes good enough that you won’t feel like you’re eating something virtuous.
Flavor Variations & Customizations
Once you’ve made the basic beetroot hummus recipe a few times, you can start playing with it. Here are variations I’ve tested:
- Spicy version: Add ¼ teaspoon cayenne pepper or a pinch of smoked paprika. It adds warmth without overwhelming the beet flavor.
- Herb-forward: Blend in a handful of fresh parsley or dill along with the other ingredients. Fresh herbs brighten it up.
- Orange and beet: Add 1 teaspoon of grated orange zest and a tablespoon of fresh orange juice instead of some of the lemon. It’s subtle but really nice.
- Roasted garlic: If you have roasted garlic on hand, use that instead of raw. It’s sweeter and less sharp.
- Horseradish kick: A teaspoon of prepared horseradish adds an unexpected bite. Not for everyone, but beets and horseradish are a classic pairing.
The beauty of making your own beetroot hummus recipe is that you can adjust it to what you actually like. Store-bought versions don’t give you that option.
You’ve got this. Make it once, taste it, and adjust. Once you figure out your preferred version, you’ll find yourself making it regularly. It’s one of those recipes that looks more impressive than the effort it takes, and that’s exactly the kind I keep coming back to.
For more on storing and handling ingredients safely, see the FDA’s safe food handling guidelines.
Beetroot Hummus
A vibrant, creamy dip made with canned beets and chickpeas. Ready in 15 minutes, naturally vegan, and perfect for meal prep or entertaining.
Ingredients
- 1 can (15 oz) chickpeas, drained and rinsed
- 1 can (15 oz) beets, drained well
- 3 tablespoons tahini
- 2 cloves garlic, minced
- 2 tablespoons fresh lemon juice
- 1 tablespoon olive oil
- ½ teaspoon ground cumin
- ¼ teaspoon salt
- Black pepper to taste
- 2–3 tablespoons water, as needed for consistency
Instructions
- Add the drained chickpeas, drained beets, tahini, minced garlic, lemon juice, and olive oil to a food processor.
- Pulse everything together for about 30 seconds until roughly combined.
- Add the cumin and salt. Pulse for another 30 seconds.
- Scrape down the sides of the processor bowl with a rubber spatula to ensure even blending.
- Blend on medium speed for 1–2 minutes until the mixture reaches a creamy, peanut butter-like consistency.
- If the mixture is too thick, add water 1 tablespoon at a time while blending, up to 3 tablespoons total.
- Taste and adjust seasoning. Add more salt, lemon juice, or cumin as needed. Finish with a few grinds of black pepper.
- Transfer to a serving bowl or storage container. Drizzle with a little extra olive oil and optional paprika or fresh herbs if serving immediately.
Notes
Drain the canned beets well and pat them dry with a paper towel—excess liquid is the main reason homemade versions turn out watery. If your canned beets are packed in vinegar, rinse them under cold water before using. The flavor deepens after a day in the refrigerator, making this a great make-ahead dip.
Storage
Store in an airtight container in the refrigerator for up to 5 days. Can be frozen for up to 1 month, though the texture may become slightly grainier; thaw in the refrigerator and stir before serving. If liquid pools on top after refrigeration, simply stir it back in.
Frequently Asked Questions
Can I use fresh beets instead of canned for this beetroot hummus recipe?
Yes, but it requires extra preparation. Roast fresh beets at 400°F for 40–50 minutes, cool, peel, and chop before blending. Canned beets are pre-cooked and blend more smoothly, so they’re more convenient for a quick beetroot hummus recipe. The flavor difference is minimal.
Is this beetroot hummus recipe vegan?
Yes, it’s naturally vegan. Chickpeas, beets, tahini, lemon juice, and olive oil are all plant-based. Just double-check that your tahini brand doesn’t contain any animal products, though most do not.
What can I use if I don’t have tahini for this beetroot hummus recipe?
Almond butter, peanut butter, or sunflower seed butter work as 1:1 substitutes. You can also use 2 tablespoons tahini plus 2 tablespoons plain Greek yogurt for a lighter texture. As a last resort, use 4 tablespoons olive oil instead of tahini plus olive oil, though the texture will be less creamy.
How long does the homemade beetroot hummus recipe keep?
Store in an airtight container in the refrigerator for up to 5 days. The flavor deepens after 24 hours. It can be frozen for up to 1 month, though the texture becomes slightly grainier when thawed.
Why is my beetroot hummus recipe watery or grainy?
A watery texture usually means the beets weren’t drained well enough. Pat them dry before blending. A grainy texture can result from over-blending or not enough liquid. Blend for 1–2 minutes until smooth, and add water gradually if needed. If using frozen beets that were thawed, drain them extra well.
Can I make this beetroot hummus recipe without a food processor?
A blender works, though you may need to add water earlier to help things blend smoothly. An immersion blender is less ideal because you’d need to work in batches, but it’s possible. A food processor gives the smoothest, most consistent result.
What should I serve with the beetroot hummus recipe?
Raw vegetables (carrots, celery, peppers, and cucumber), pita chips, whole grain crackers, or roasted chickpeas all pair beautifully. You can also spread it on sandwiches or swirl it into grain bowls. The vibrant color looks great on a vegetable board.
Can I make this beetroot hummus recipe ahead for a party?
Absolutely. Make it up to 2 days ahead and store in an airtight container in the refrigerator. The flavor actually improves after 24 hours. Transfer to a serving bowl, drizzle with olive oil, and add fresh herbs just before serving.